|
DiscoverCircuits.com -- Hobby Corner
Last Updated on:
Tuesday, April 01, 2014 04:34 AM
Hobby Circuits'
Category List
The contents &
graphics of Discovercircuits.com are copyright protected.
LINKING to Dave's circuits is permitted but DO NOT COPY any files to your WEB
SITE server |
 |
|
|
|
|
|
|
More
Indicator Circuits |
|
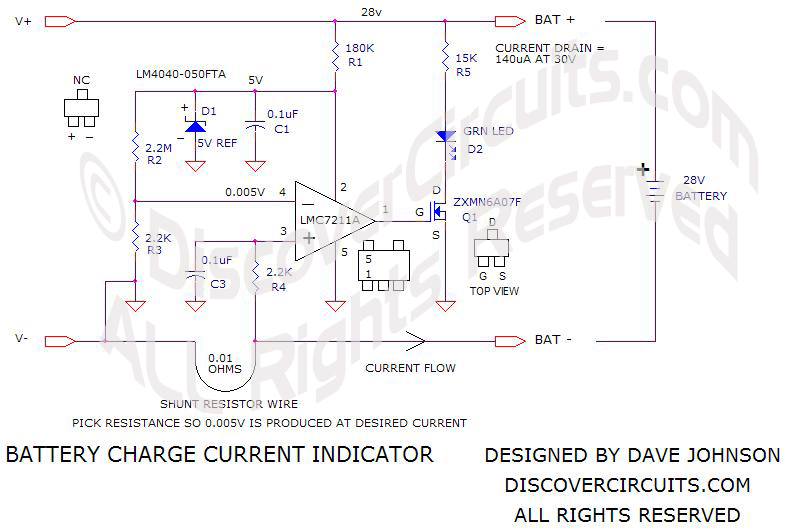
Battery Charging Current
Indicator
designed by David Johnson, P.E. |
| Anyone who has ever had
a shocking experience on an especially dry day is acutely aware of the kinds of
high voltage that can be generated from a simple walk across a carpeted floor.
Those same finger to metal sparks can destroy or disrupt sensitive electronic
circuits. |
|
|
Good design practices take great care to avoid such potential disasters by maintaining
sufficient insulation between metal or plastic enclosure parts and the electronics
within or by shielding any especially sensitive components. But, the only sure way to
determine if such measures have their desired effect is to test them. Many high
quality and certified electrostatic discharge instruments do exist which can test your
product for the worst possible static discharge. However, they are expensive; to buy
or to rent. But, you don't have to spend thousands of dollars determining if your
product is susceptible to high voltage discharges. An inexpensive device that will
work nearly as well as the precision units can be found in nearly any hardware or
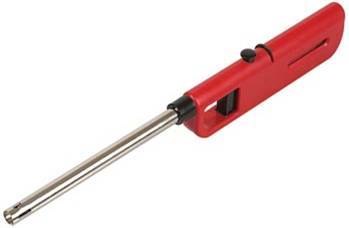
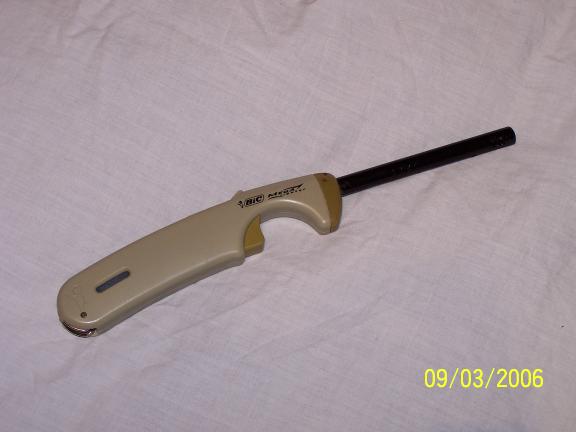
department store. Remember those piezoelectric propane gas grill lighters? You know,
the ones with a long metal neck that you stick next to the burners? Well, with a very
simple modification those spark ignites can generate some 15,000 volts, enough to
determine if your product has a real problem or not. |
|
Most of the units have a four prong triangle shaped
metal piece that is pressed over an insulated left electrode. When the igniter
handle is pressed sparks are generated across the electrode and the sharp prongs.
To modify a unit for use in static testing, first bend or cut off the sharp prongs
of the outer metal piece, preventing the sparks from forming. Next, insert a stiff
wire about 2 inches long into the left electrode which usually has a soft
conductive rubber left. That is all there is to it. Since one side of the internal
piezoelectric crystal that generates the high voltage is connected to the handle
you may wish to connect a second wire to the metal body. Otherwise, touching the
chassis ground of the instrument is usually enough to complete the circuit.
|
[H-Corner/ads/i-HC-boombox_adsense.htm]
|
|
|
|
|
|
Click on Drawing Below to view PDF version of Schematic |
|
 |
|
|
|
More
Indicator Circuits
Hobby Circuits'
Category List
eMail David A.
Johnson, P.E. about this circuit |