 |
 |
|
Buddhist Statue |
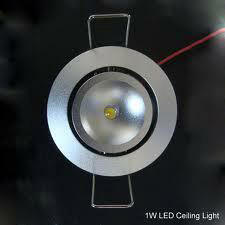
1w
LED Ceiling Light |
|
Wily did some
quick calculations. Wily’s plan was to use a solar panel to charge a battery
during the day, so the stored energy could keep the light going at night. A 1 watt
LED running 24 hours would chew up 24 watt-hours of energy per day. Wily
figured that the storage battery should store at least twice that figure, to take
care of cloudy days |
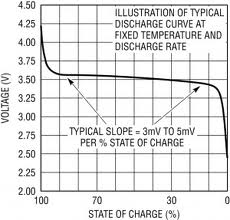 |
Wily had many options for what kind of battery to use. He
could use a 3.6v lithium ion cell. As the typical discharge curve below
shows, the battery voltage remains above the 3.2v needed by the LED for most
of the battery life. This voltage would mean the constant current drive
circuit for the LED would be fairly simple. But, to last the required 48
hours, the battery capacity would have to be greater than 15 Amp-hours.
This would mean he would have to wire several batteries in parallel.
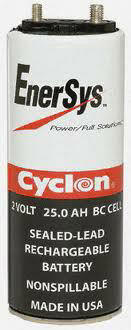
Wily could also use two 2v
lead acid cells. Again, the 4v battery voltage would be close to that
needed by the LED. This would allow him to use a simple linear LED current
control circuit. A company called Cyclon makes a nice 25 Amp-hour cell,
which would insure enough energy storage for 48 hours plus a good 50% margin. |
|
|
Lithium
Ion Discharge
Voltage Vs Time |
|
 |
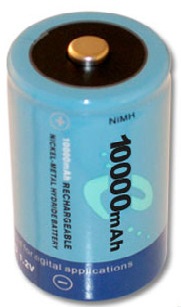
Wily also
knew that there were some nice 1.2v 10 Amp-hour NiMH
cells available. Wiring
three of them in series would give him 3.6v. But, he would have to wire two
cells in parallel to insure a 20 Amp-hour rating. That would mean a 6
cell bank. Wily also didn’t like charging NiMH
cells, which usually
require a more complex charging circuit to maintain a long battery life. |
|
25 Amp-hour
Seal Lead Acid Battery |
|
|
|
| |
Finally,
Wily could go with a very conventional sealed 12v lead acid battery.
These are quite common and could make it easy to replace a worn battery when
the time came. But, the higher voltage would mean a bit more complex
switch mode LED driver circuit would be needed. |
 |
| |
|
|
|
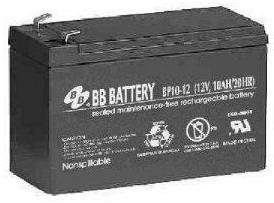
| In the end,
after giving all these battery options some consideration, Wily decided to go
with the more conventional 12v battery. Wily knew that the battery
should not be discharged much below the 50% point. That put the total
required battery stored energy rating at about 100 watt-hours. A battery
with a 10 Amp-hour rating should be good enough for this application. |
 |
| |
10 Amp-hour 12v Seal Lead Acid Battery |
|
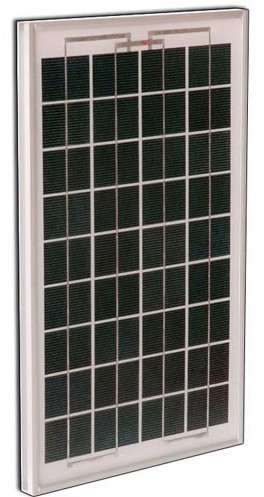 |
Next, Wily
shifted his attention to the solar panel. Wily liked to use 6 hours of
sunlight per day to estimate the size of the solar panel. If the panel
needs to fully charge the battery and run the LED during those 6 hours, the
panel should put out about 10 watts of power. Panels containing 36 solar
cells are common for 12v systems. They are usually wired in a 4 x 9 series
array. Wily
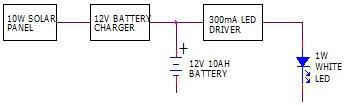
looked at the LED specs again. The light they wanted to use had a 3.2v forward
voltage at a forward current of about 300ma of current. Wily had many options
for a driving the LED. Since he was planning on using the 12v battery,
he decided to use an off-the-shelf switch mode type converter, designed to
drive the LED with a constant 300ma of current.
Between the solar panel
and the 12v battery, Wily decided to include an off-the-shelf battery charge
controller. The controller will insure that the battery would not be
overcharged. This would mean a longer battery life. |
| |
| 12v 10 watt
Solar Panel |
|
| Wily’s
complete system is illustrated below. He suggested that the battery, charge
controller and LED driver module all be mounted inside a vented box.
Other than that, he left the final wiring up to the engineer in charge of the
lighting system. |
|
|
|